
Mandala Starter and Free Download

While everyone is looking for things to do at home, coloring is a great way to pass the time and lessen anxiety. Sit in a comfy chair by a window or even outside if the weather is nice and enjoy the fresh air.
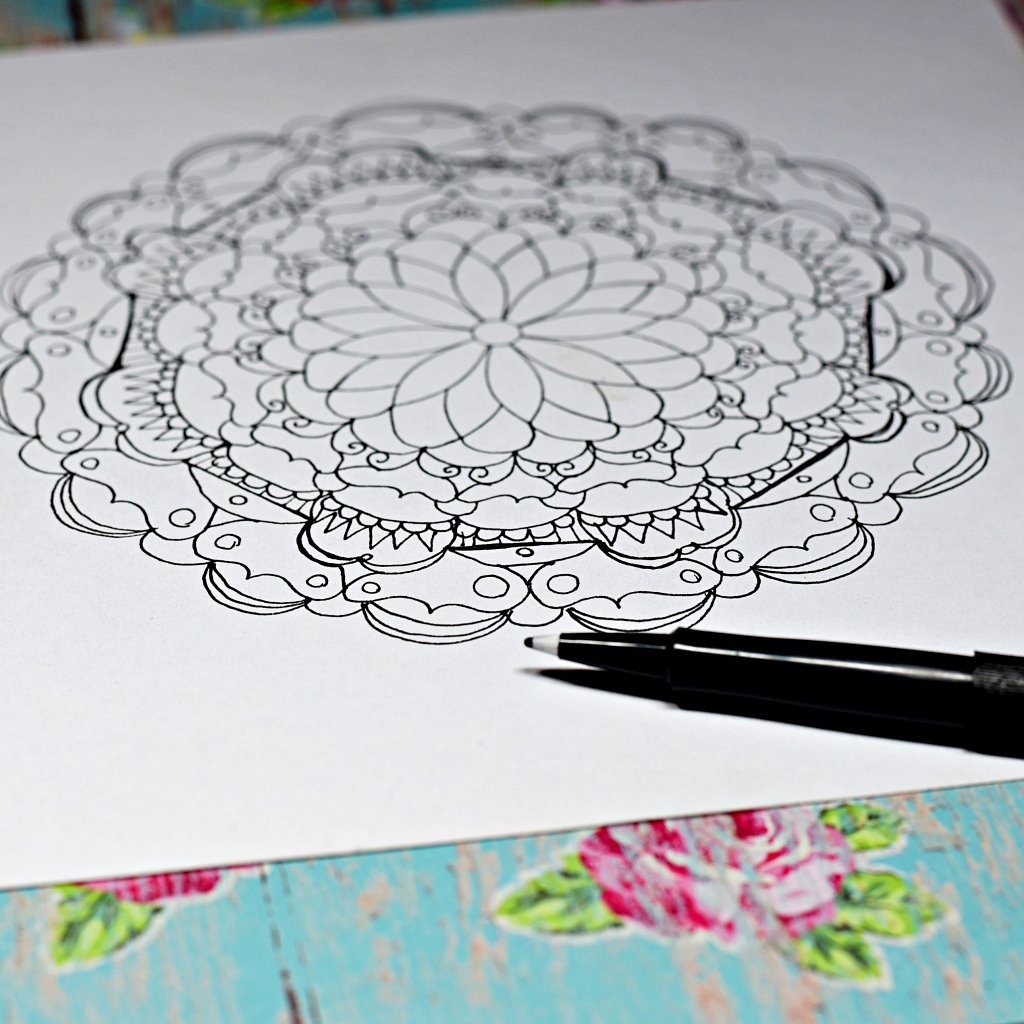
We have created a free download of a hand drawn mandala that you can print out and color in. To get the free .pdf download click here.
If you want to draw your own mandala, I have come up with some tips to make it fun. You can use office paper or card stock...any paper thickness will work.
  • Trim an 8.5" x 11" sheet of paper to 8.5" so that you have a square page (8.5" x 8.5")
  • (If you have A4 sheet, trim to 210 mm so you have 210 mm x 210 mm)
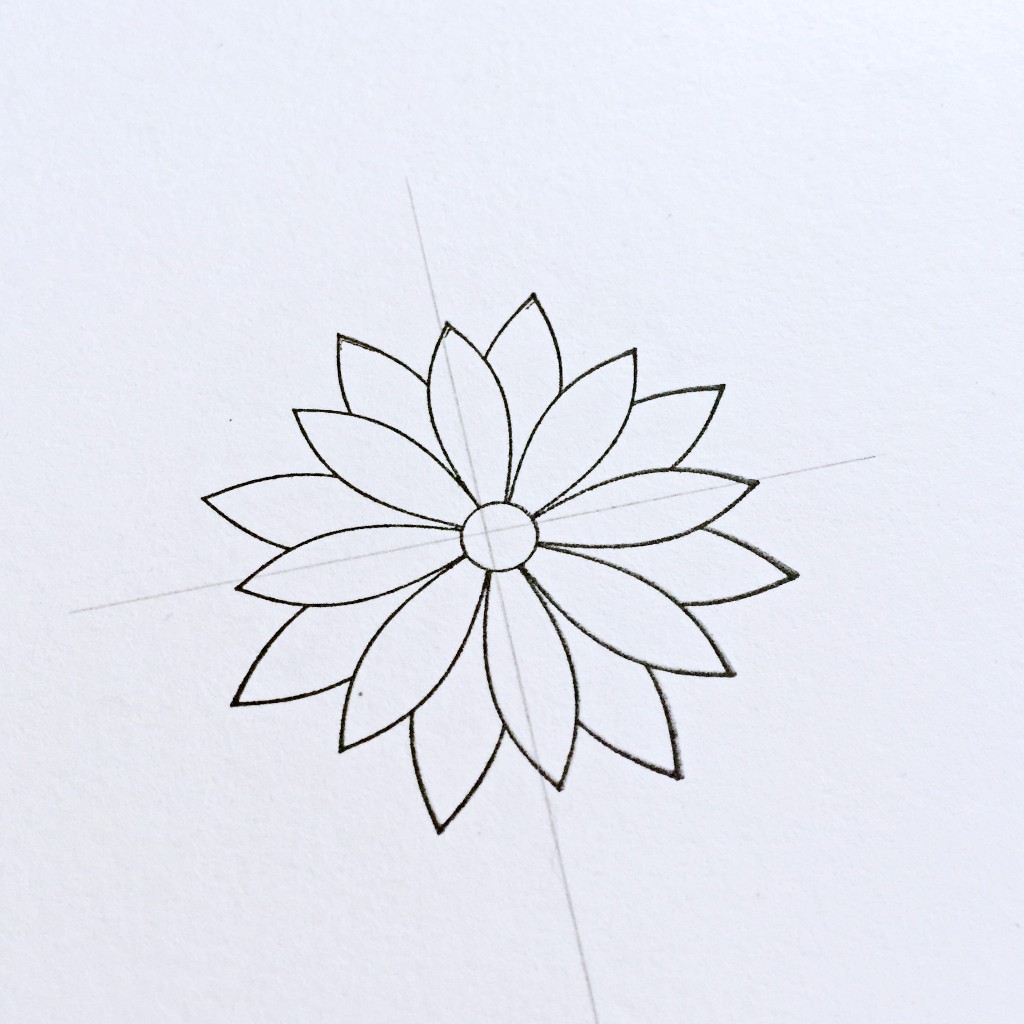
  • Measure the center of the page and draw a line using a pencil (at 4.25" for letter size).
  • Turn the paper and measure the center again and draw another line
  • Now you have a cross in the center.
  • Draw a circle whatever size you wish.
  • Use a pencil to draw, then use a black marker over the pencil lines.
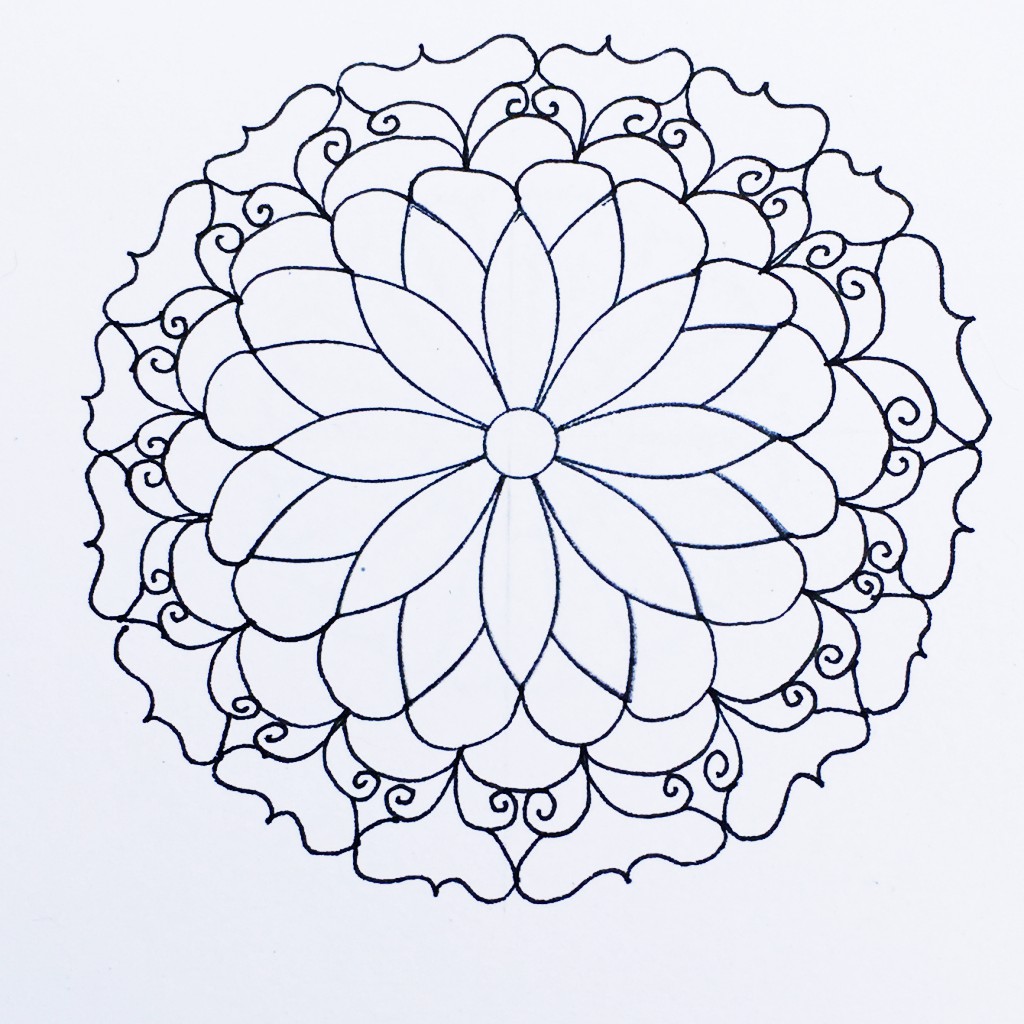
  • Alternate various arcs, swirls, fancy parenthesis like this }, dots, etc.
  • Once finished, you can color in your mandala with pencils or markers.
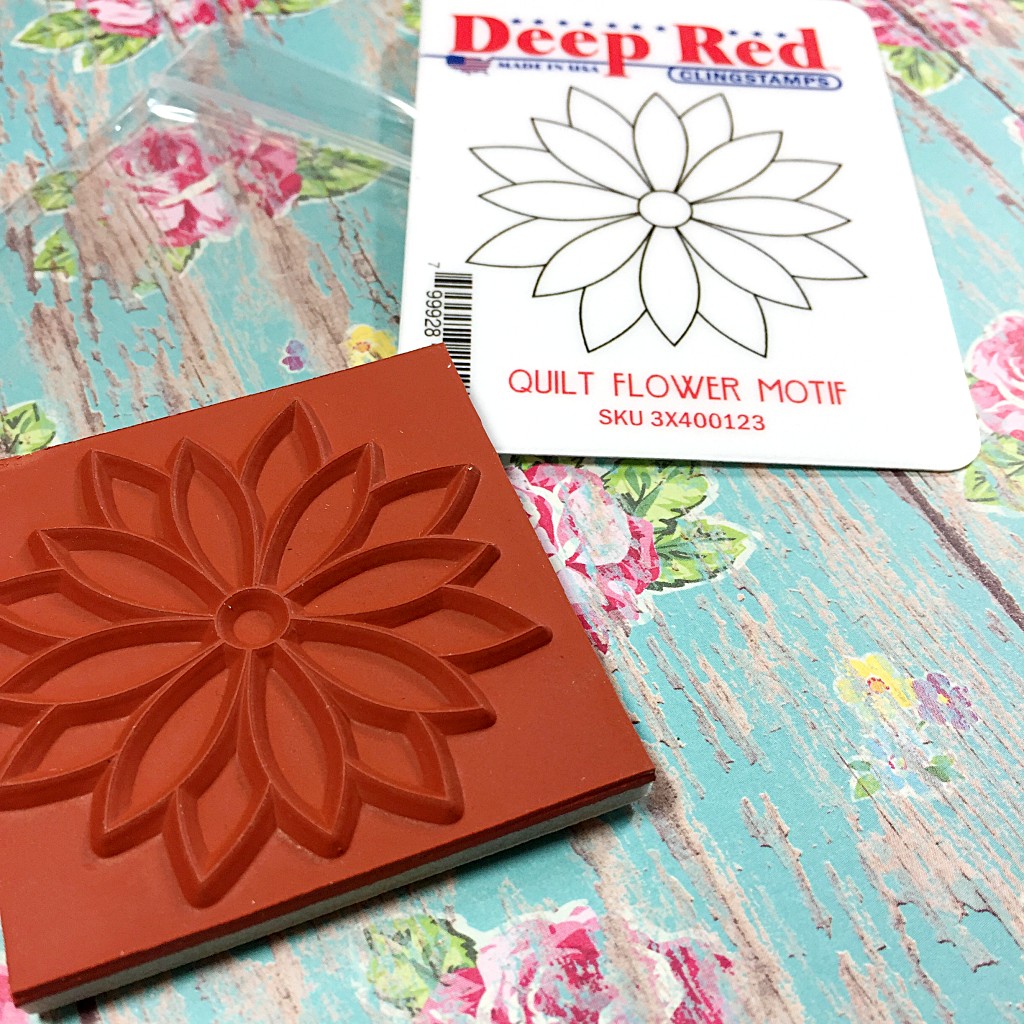
Optionally, you can stamp a design in the center to get a perfect start, such as our Quilt Flower Motif stamp. Or use any stamp design that is symmetrical. This helps you to create an un-skewed mandala on your page.
The Quilt Flower Motif stamp works beautifully because you can draw connecting lines on the points. A mandala is about how ornamental and connectivity of the circle. There is a reason it is used in art therapy. 
No special tools are required to start drawing mandalas. If you have ever doodled in school or a company meeting, you can do this. Once you draw one, you can then color it in using pencils or markers. Ahhh....let the relaxing begin :-)

Popular posts from this blog

Journaling Techniques to Create a Card

​In this project, I combined some favorite journaling techniques to create a handmade card.  For those of you that do not create junk journals, that's ok because the processes, like watercolor paint splashes, rolling edges of the paper are used below make a very pretty card with many layers. I also include below a couple of tips on keeping your tools sharp and options for using different focal points. We use a center layout where everything is built around the middle line of the card. Embellish using the top left and bottom right with a background pattern of script in black ink gives the green center a nice contrast which is often seen in journaling. (The red flowers are watercolor designs that were inkjet printed.) You can use stickers of flowers just the same. The  ​Venus de Milo Rubber Stamp  is now available. It measures about 1.25" wide x 3.25" tall.  The oval frame is from our  ​Create a Cameo Rubber Stamp Collection .  You will notice, I used the top part of the Ve

Non-Halloween Stamps to Create Scary

  The dramatic effect of white embossing onto black paper doesn't just have to be done at Halloween. Here we used some unconventional stamps to create a scary tag with a base of black. While these stamps normally wouldn't be in the Halloween category, they end up somehow being perfect to create a scary tag. The best way to get a bright white look is by embossing with white powder. Embossing always comes out looking extraordinary and worth the extra effort. Above is our  Victorian Man Profile Rubber Stamp  embossed onto black chipboard. He'll make a great embellishment for a Halloween. (measures about 2 inch x 2 inch). A tree branch from our  Season of Joy Collection  is one of my favorite stamps. It expresses the beauty of nature in a simple way. Above, the branch stamp was embossed in Copper Powder onto black card stock. Our  Grunge Ticket Rubber Stamp  is seen above, embossed in white onto black card stock. The stamp measures about 3 inches tall x 1.5 inches wide. I love

IPhone Cover Decor

Since Xyron has a fabulous way of making anything into a sticker, I decided to create décor for the back of my cell phone case. Taking beautiful, damask patterned glitter paper from DCWV, 6x6 pad, 'The Glitter Basics" I cut out my iPhone 6s cover pattern using a template I created in plain white cardstock of my case.  To cut out the circle in the middle, I used an X-Acto knife.     The Scooter Rubber Stamp was embossed on red paper and cut out with scissors.  I smudged 'Claret' color StazOn ink around the edges.       After placing the scooter through the Xyron Creative Station, I placed it onto the iPhone pattern and ran both through together.  The Creative Station can take such thick items.  You will see below that I ran embellishments made from shrink plastic and it had no problem with them. One of the magical features of the Xyron's sticker makers is that the top of your project comes out unscathed.  You just peel the plas